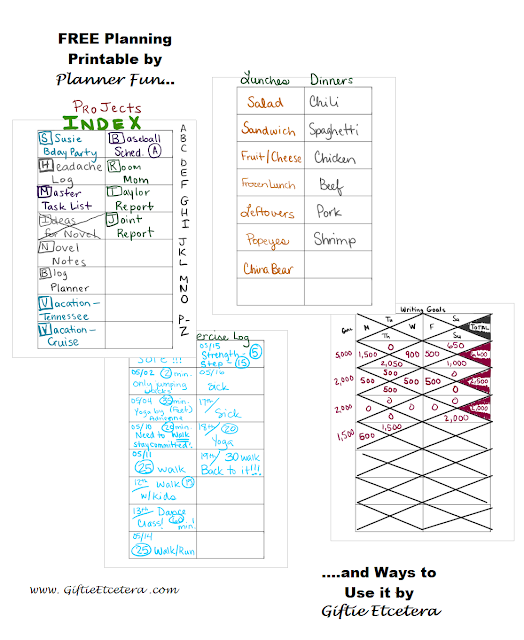
Becky at Planner Fun teams up with Giftie Etcetera every month to offer a free printable, with a ton of new ways to use it.
This week, we are using her cool page full of boxes. So versatile. So simple. So useful.
Make sure to visit Becky's blog (link at the end of this post)! She's awesome and most of her printables are free.
Showing posts with label write. Show all posts
Showing posts with label write. Show all posts
Friday, May 13, 2016
Wednesday, March 9, 2016
How to Carry Extra Ink Pens in Your Planner
***This post may contain affiliate links. See my "Disclaimer" link for additional details.***
When a person with a planner talks about ink, he or she is probably not covered in colorful tattoos.
When a person with a planner talks about ink, he or she is probably not covered in colorful tattoos.
Friday, February 19, 2016
Essential Planner Page Details
Today, this planner EXPERT realized that I have an appointment scheduled on January 31st at 11:45 a.m.
I know because, like I said, I AM AN EXPERT, so I dutifully jotted the appointment in the Future section of my planner.
I know because, like I said, I AM AN EXPERT, so I dutifully jotted the appointment in the Future section of my planner.
Sunday, January 24, 2016
Monday, December 28, 2015
Top Ten Planner Posts of the Year: Post # 5
If you are thinking of setting some rules for keeping your planner easy-to-use in the new year, the #5 Giftie Top Ten post is a classic set of ideas for how to write in a planner.
Tuesday, October 27, 2015
How a Blogger Becomes a Writer
I never majored in English.
Back in college, my destiny seemed tied to dealing with people one-on-one, possibly as a counselor, teacher, or lawyer.
Back in college, my destiny seemed tied to dealing with people one-on-one, possibly as a counselor, teacher, or lawyer.
Saturday, October 3, 2015
How to Write More Interesting Facebook Posts for Bloggers and Nonbloggers
Facebook gives people a chance to peek at the quality of your writing.
If you are a blogger, you write for a living. Sure, a blog isn't a novel, but if you want people to read your blog, you've got to be interesting and give them quality content.
If you aren't a blogger (most of you, I'm guessing), you still want to write cool, interesting stuff on Facebook!
I've got some tricks that will help your posts be more compelling for your friends and readers.
Write from the heart.
It's so important to be reveal your true self, even if you don't reveal everything. If you write it, make sure you believe it and would stand behind it.
You don't have to tell everyone everything, though. Facebook is way too public, even with privacy settings, to be used recklessly. But reveal enough of yourself that people recognize you.
Use good grammar and spelling.
Facebook is casual. Typos happen.
But it is a sign of respect for your friends that you write something that is easy to read.
Attention Grammar Nazis: This does NOT mean you should correct someone for poor grammar or spelling. Perhaps they have a learning disorder or a lack of education. Maybe they have coordination problems when posting from a smart phone. Use your manners!
Show the good and the bad.
Nobody needs to know about the details of your medical procedure. (Seriously, we don't. And we DO NOT want pictures of that toe nail. Ever.)
But don't limit yourself to only good stuff or only bad stuff. Be real. It's only fair to your friends. Plus, it saves you from being labeled a complainer or a braggart.
Use Facebook hacks.
Facebook has lots of little things that can make posts more interesting.
***Tag someone in a post by simply typing their name while posting, and selecting the tag when it pops up.
(Caution - their friends will be able to see your posts if you tag them. If you prefer, tag them in the first comment, instead, and they will get a notification but their friends won't see your post unless they are also your friends.)
***Add photo to your posts by clicking on the camera icon in the lower left corner of the status box.
***Tag people at the end of the post (rather than in the middle of the status) using the person plus icon.
***Add your feelings using the smiley icon.
This tip helps your readers know what you are feeling and clarifies the post.
***Check-in, done with the teardrop icon, tells where you are.
(Caution - consider only checking-in after the fact, for security purposes.)
***Customize your audience.
Sometimes, only some people need to read what you are writing. Maybe you want to exclude your boss or a friend who is dealing with heavy stuff from a particular post.
Find out how here.
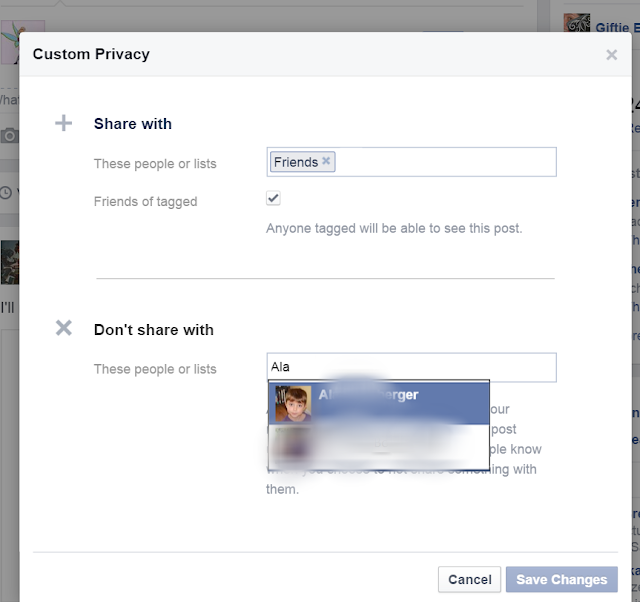
Here's a sample of me customizing privacy so my husband can't read about his upcoming surprise party:
(Aside for husband - Don't worry, dear husband, I'm only kidding. You'd hate a surprise party!)
Here's what my final status looks like, using the photo, feeling, and check-in icons.
Most of all, enjoy Facebook. It's a conversation, not a performance. Remember that and you'll be fine!
If you enjoyed this post, please share on Facebook.
Etcetera.
If you enjoy what you read at Giftie Etcetera, please share on social media. Click here to join the Giftie Etcetera Facebook group.
Partied at: Reasons to Skip the Housework, Happiness is Homemade, Simply Sundays
Thursday, October 1, 2015
My New Handwriting Obsession
***This post may contain affiliate links. See my "Disclaimer" link for additional details.***
Most people who plan love to explore handwriting.
Smaller handwriting means that a lighter planner works. Larger handwriting can be beautiful and easy to read.
Most people who plan love to explore handwriting.
Smaller handwriting means that a lighter planner works. Larger handwriting can be beautiful and easy to read.
Wednesday, May 13, 2015
5 Ways to Write a Schedule in a Planner
***This post may contain affiliate links. See my "Disclaimer" link for additional details.***
No matter how much you follow a system or use borrowed ideas to write in and set-up your planner, every single planner is like a fingerprint of the individual.
Arrows create a clean daily plan, but they leave out a lot of detail. It's sometimes difficult to tell at a glance the start and end times of events.
However, it does give a decent overview of the breakdown of your day.
My pet peeve about arrows? They are never perfectly straight. See how the "Dinner w/ Bob" arrow is too far to the left? Drives me crazy!
Boxes allow the writer to block off large chunks of time. Plus, if you are a better artist than I am, you can theoretically match up the squares on the boxes. If you need a quick view of your day, this is the way to go.
However, a ton of short appointments would look rather crowded and messy with this method.
Casual planning, in this case, means putting in information in a casual, writing-across-the-page way. I circled the key times in the example, to help indicate when important activities start. It's a quick, easy, and effective way to enter information in a planner. I like this method for a rapidly evolving day.
The disadvantage? It can get messy and there is not a lot of information (like end times) on the planner page.
Coloring in a box, with a computer or a highlighter, is a nice way to create a neat visual.
It takes a lot of input time, though, and can be difficult to change or make perfect. This method is best reserved for schedules that need to be shared with others.
This is how I plan!
1. Start times, plus any set end times, are written on the appropriate line.
2. Important events are underlined (or circled, which I don't do only because I circle repeating events).
3. Related actions are noted with an arrow.
4. Notes are indicated with a dash.
5. Informal times (like lunch) are jotted on the page, across the time slot.
6. A partial left-side box is drawn from before the start time to after the estimated end time.
No matter how much you follow a system or use borrowed ideas to write in and set-up your planner, every single planner is like a fingerprint of the individual.
One way to create a unique look in your planner is to carefully select the way that you write your schedule.
I was looking at pictures of daily schedules that some members of the Giftie Etcetera Facebook group posted, and the difference between each daily plan was striking. Each person used a unique system for writing their scheduled appointments.
This post overviews some of the most popular schedule writing methods.
(My apologies. I have no idea who created the underlying schedule form that I am currently using in One Note. If it's you, let me know so I can share your blog link and give you full credit. Since I don't own the underlying schedule form, I will not share a blank copy.)
*Arrows
Arrows create a clean daily plan, but they leave out a lot of detail. It's sometimes difficult to tell at a glance the start and end times of events.
However, it does give a decent overview of the breakdown of your day.
My pet peeve about arrows? They are never perfectly straight. See how the "Dinner w/ Bob" arrow is too far to the left? Drives me crazy!
*Boxes
Boxes allow the writer to block off large chunks of time. Plus, if you are a better artist than I am, you can theoretically match up the squares on the boxes. If you need a quick view of your day, this is the way to go.
However, a ton of short appointments would look rather crowded and messy with this method.
*Casual
Casual planning, in this case, means putting in information in a casual, writing-across-the-page way. I circled the key times in the example, to help indicate when important activities start. It's a quick, easy, and effective way to enter information in a planner. I like this method for a rapidly evolving day.
The disadvantage? It can get messy and there is not a lot of information (like end times) on the planner page.
*Colored Boxes
Coloring in a box, with a computer or a highlighter, is a nice way to create a neat visual.
It takes a lot of input time, though, and can be difficult to change or make perfect. This method is best reserved for schedules that need to be shared with others.
*The Giftie Method
This is how I plan!
1. Start times, plus any set end times, are written on the appropriate line.
2. Important events are underlined (or circled, which I don't do only because I circle repeating events).
3. Related actions are noted with an arrow.
4. Notes are indicated with a dash.
5. Informal times (like lunch) are jotted on the page, across the time slot.
6. A partial left-side box is drawn from before the start time to after the estimated end time.
You can see how The Giftie Method is superior, right?
Ha ha! It's okay if you can't. My method might not be your preferred method, and as with any planning, you should do whatever works best for you. You have unlimited options when you open your planner. Choose wisely.
If you enjoyed this post, please share on social media.
Ha ha! It's okay if you can't. My method might not be your preferred method, and as with any planning, you should do whatever works best for you. You have unlimited options when you open your planner. Choose wisely.
If you enjoyed this post, please share on social media.
Etcetera.
This post was created using OneNote on a Microsoft Surface Pro 3.
This post was created using OneNote on a Microsoft Surface Pro 3.
Sunday, February 22, 2015
New Ways to Write in a Planner: A Flashback Post
Loyal Readers will recall this Sunday Flashback Post, but the rest of you should really check it out.
As usual, I went back to look at things that have changed since the original post.
I do most of the writing in my planner just like I did back in 2013! But some things have changed.
Now, I highlight to scratch things out. And when I use a line to take notes, I add the symbol for a task (an O) before the context code.
See? Very little changed! That's why this classic post is worth reading. It works!
Etcetera.
Saturday, February 7, 2015
5 Cool Ways to Use OneNote on My Surface Pro 3
***This post may contain affiliate links. These links help you find the items that I use in my planner and financially support this blog. See my "Disclaimer" link for additional details.***
I've been playing with OneNote 2013 on my Surface Pro 3 . In the process, I've learned lot of new, cool stuff that I can do with OneNote!
*Coloring Book
OneNote is like a coloring book with unlimited pages. If I can find it on-line, I can color and decorate it. Here, I did my new Facebook profile picture.
*Planner
I've written before, of course, about using OneNote for my daily planning. And it leaves unlimited room to doodle.
*Tutorials
Want to show friends how to edit a photograph in MightyText? Want to teach Grandma how to check her Facebook messages?
I just double click on my pen, write in my notes on the picture, and upload to the web.
*Editing
I've been working on three novels. (I blurred out most of the writing, so no one can copy it.) OneNote is a fabulous way to note my edits. Then, I can correct my novel in Word, side-by-side with my notes.
I can't wait for Nanowrimo this year!
*Super, Extra Cool Note-taking
Of course, anyone can take notes in a notebook.
But in OneNote on a Surface Pro 3, I can copy my favorite blogs, read them, and take notes on things that I want to follow-up on.
This works for research for work or school, too.
Welcome to my new readers who are following my explorations into using technology for managing lives. Check back here each Saturday for technology tips or subscribe to my blog for updates.
Etcetera.
Sunday, February 1, 2015
How to Fall in Love with Your Planner
All month, on Sundays, I plan to look back at a popular Giftie post and see if it still rings true. Today, I am going to examine my most popular post of all time, Mr. and Mrs. Planner.
I wrote that post in almost two years ago. My binder has changed (in color only, from black with muted circles to black with white flourishes), but the post still rings true in every other way.
I still treat my planner like a marriage - not an easy or flawless relationship, but one with the potential for so much reward if we work together. There are plenty of things that can be done to make a plannerd fall in love with a planner, and stay that way!
Take a minute and read it here. (For bonus entertainment, this post reveals how far I've come as a blogger. Eek. I was still finding my voice back then.)
I wrote that post in almost two years ago. My binder has changed (in color only, from black with muted circles to black with white flourishes), but the post still rings true in every other way.
I still treat my planner like a marriage - not an easy or flawless relationship, but one with the potential for so much reward if we work together. There are plenty of things that can be done to make a plannerd fall in love with a planner, and stay that way!
Getting past the honeymoon phase and staying together blissfully is what the planner community calls "planner peace."
To achieve planner peace, one must follow a few simple guidelines.
1. The color, style, and feel should be personally appealing.
1. The color, style, and feel should be personally appealing.
If I didn't love the planner at first glance, I never use it for very long!
2. Just like any other relationship, the planner and the plannerd should spend time together every day.
3. The planner should be portable enough to fit the plannerd's lifestyle.
4. On a related note, buy totes, briefcases, and purses that are big enough to hold the planner comfortably.
5. Designate space in the home for the planner to land at the end of a busy day.
Almost two years later, and I am still doing these things.
The most important component of a good relationship with my planner? Simply writing things down. That single act nourishes the relationship and lets it blossom beyond the honeymoon phase.
Etcetera.
Linked at:
The Evolution of Mom
Monday, January 26, 2015
7 Tricks to Remembering Everything
I have many of my friends completely fooled. They think I am way smarter than I actually am. (My kids and husband think that, too, though I suspect that my husband might be on to my little secret.)
Is this the point where I apologize to my friends for fooling them into thinking I am smart? Or, gasp, maybe this is the part where they admit that they always knew how dumb I really happen to be!
(Dear Friends, please lie to me, not just about my brilliance, but also about my singing voice and my looks. My ego is fragile. Sincerely, Giftie.)
Try these seven things and see if you can fool your friends, professors, bosses, clients, and family with your apparent genius.
Is this the point where I apologize to my friends for fooling them into thinking I am smart? Or, gasp, maybe this is the part where they admit that they always knew how dumb I really happen to be!
(Dear Friends, please lie to me, not just about my brilliance, but also about my singing voice and my looks. My ego is fragile. Sincerely, Giftie.)
Actually, I just tend to remember things. That doesn't take much brain power at all. The secret to remembering things? Memory tricks!
 |
| Memory Tricks: Remember Everything |
1. Write Notes
Physically writing things down is actually important for recall. Yes, I do look at the notes later, which is the ultimate way to recall them, but even if I never look at what I wrote, I am much more likely to remember in the first place if I: took the time to listen; opened a planner, notebook, or my Surface Pro 3; grabbed a pen; and recreated the information on the page.
This works even if you never look at the page again, as long as the amount of information is limited.
(For some of the more techno-savvy readers in my audience, typing might seem to do the same thing. If it's working for you, great. Don't change a thing. But studies do show that handwriting is more effective for memory creation.)
One reason I got a Surface Pro 3 is because of the ability to handwrite and not being limited to typing.
2. Visualize
If I want to remember something, I take the time to visualize it. For example, in parking lots, I often look around and visualize myself walking back to my car.
TIP: Snapping a picture of the parking space on a smart phone works, too.
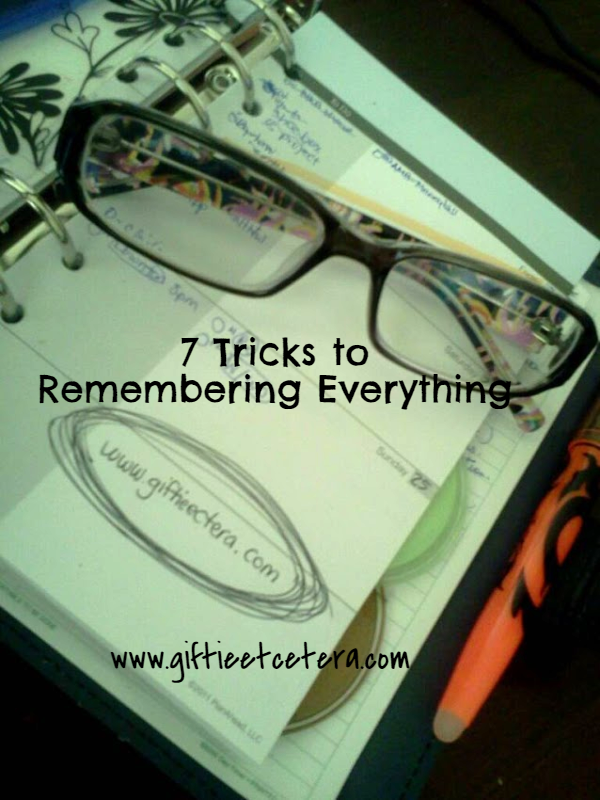
Another way to visualize is to make a crazy picture with the information. To remember that Giftie Etcetera is a website about planning and productivity, look at this picture again, this time as a smiley face, with the planner as the face, the glasses as the eyes, and the website address as the smile.
3. Create Silly Connections
If I need to remember a list on the run, I often resort to silly connections.
 |
| Handwriting for Memory on my Surface Pro 3 in OneNote |
2. Visualize
If I want to remember something, I take the time to visualize it. For example, in parking lots, I often look around and visualize myself walking back to my car.
TIP: Snapping a picture of the parking space on a smart phone works, too.
Another way to visualize is to make a crazy picture with the information. To remember that Giftie Etcetera is a website about planning and productivity, look at this picture again, this time as a smiley face, with the planner as the face, the glasses as the eyes, and the website address as the smile.
3. Create Silly Connections
If I need to remember a list on the run, I often resort to silly connections.
For example, "buy milk, eggs, stamps, and soda" might mean taking the first letters of the words, connecting them, and spelling MESS.
Or I might make up a song. "I'm gonna buy buy buy buy some milk milk milk milk; I'm gonna buy buy buy buy some milk and eggs; I'm gonna buy buy buy buy some stamps, stamps, stamps; I'm gonna buy buy buy buy some stamps and soda."
(I would identify a tune for singing that song if I had any musical talent at all. I do not. No lies are going to change that reality!)
Maybe I create a story, where I throw eggs and sour milk at my enemies, while stamping my feet and chugging soda.
EXTRA CREDIT - Memory tricks are called mnemonics, and Trick #3 shows the most common examples of mnemonics.
4. Repeat, Repeat, Repeat
Notice that in my very bad song above, I repeated buy four times. That way, I remember I need four things. I also repeated some of the items on the list until I remembered them. And singing the song over and over makes me recall every word.
(Currently, I am memorizing all of Taylor Swift's latest CD. Yes, I'm forty years old. And I'm only a little bit ashamed.)
(Currently, I am memorizing all of Taylor Swift's latest CD. Yes, I'm forty years old. And I'm only a little bit ashamed.)
Repetition is a completely valid way to memorize, though I find that it works better for physical actions (e.g., putting the key on a hook by the door daily, and even going to correct myself if I forget, until I remember without thinking about it).
5. Work the Material
This one is especially good for students or someone doing a presentation, but if I work with material, I remember it. Outlining, self-testing, organizing the information, or making flowcharts often sets the memories in my brain, whether I intend to memorize the material or not.
The simpliest form of working the material is explaining it to someone. Teaching is, indeed, the highest form of learning.
6. Build a Routine
If I need to remember something on a regular basis, I build a routine by writing down the routine, practicing the routine, and, eventually, mastering the routine.
One concrete example of this is the way that I cook. I set up anything that takes time (e.g., boiling water, preheating oven), set out all ingredients with the stuff to be cooked first closest to the stove, and work to the outer edges of the set up raw food until I am done cooking. Once everything is cooking (with appropriate timers), I start cleaning during that "found time." Since I do this the same way every night, I rarely forget an ingredient or to cook a side dish or component.
One concrete example of this is the way that I cook. I set up anything that takes time (e.g., boiling water, preheating oven), set out all ingredients with the stuff to be cooked first closest to the stove, and work to the outer edges of the set up raw food until I am done cooking. Once everything is cooking (with appropriate timers), I start cleaning during that "found time." Since I do this the same way every night, I rarely forget an ingredient or to cook a side dish or component.
Yes, at first, I wrote down that routine, but now I never have to look at it!
7. Associate with an Action
7. Associate with an Action
Finally, associating something that I want to remember with an action helps a ton!
For example, I process receipts when I plug in my cell phone upon returning home. I clean the kitchen while cooking. I take my meds when setting my alarm clock. I check my planner while drinking coffee.
These tricks work no matter your age - whether you are 4 or 40 - so try them and see if they improve your life.
Etcetera.
Saturday, January 3, 2015
The Desk Reset
Whether you work from home or at an office, you likely have a table or desk where you work. I work from home (or in libraries or coffee shops), so I have a small bookshelf type desk that I work at, either blogging, novel writing, doing legal research, or planning and budgeting.
Every now and then, a desk reset is in order.
Personalize Without Fear
Don't make your desk something for others to enjoy. Make it shine with your personality. You have to work there. You have to love the space.
Yes, I am a lawyer and, yes, I do mean this in your stuffy law firm, too. Be the quirky one. You won't get fired for it, but you might get noticed. (Okay, you probably won't be fired for it. I'd do it anyway.) Of course, keep it tasteful and consider
whether only coworkers will see it, or if clients will see it, too.
I have my special basket designed by a quilter friend for stuff that leaves the house, like my keys and glasses (upper left hand corner), a personalized zipper pouch full of planner supplies (upper right hand corner), and my "READ MY BLOG" ornament (lower shelf, in front of the pens and scissors).
Maximize Desk Space
Desk space is limited. Use it wisely.
Even though I personalize my space, very little is just decorative. Notice the wipe/erase board, the hole punch, and all the other bits and bobs that I actually use almost every day.
Prioritize Placement
Place items that are used daily in the most convenient space, things that are used weekly in a less convenient place, and things rarely used in a different space.
Also, group like stuff together whenever possible.
I am very careful about placement. Things that leave the house go near my purse (the hanging blue one on the upper left hand corner). The space where I plan and write? It's not even in the picture because it just stays empty and ready for my laptop and planner.
Use Interesting Containers
Don't think that you have to use square containers from office supply stores.
I use an open mouthed glass canning jar for unprocessed receipts. I use my quilted basket for things to leave the house. My makeup travel bag is perfect for planner supplies. A purple pill case holds my magnet bookmarks, while a suction-sealed spice jar holds binder and paper clips.
It's a good time to reset your desk. Make it your own. You'll be happier and the desk will be an easier to use.
Monday, October 14, 2013
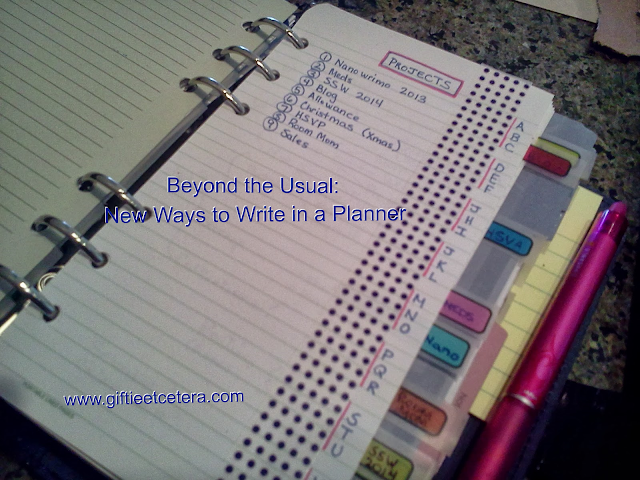
Beyond The Usual: New Ways To Write In Your Planner
Others are completely my own ideas.
Some of these planner hacks have been mentioned before on the Giftie Etcetera blog, but are worth repeating.
I use all of these regularly in my day-to-day planning.
UPDATE: This post was written before I got around to more professional images, so the images are shadowed, amateurish, and sometimes creepy. No matter! The content is worth reviewing. Now, carry on.
The Box:
Perhaps the best filing trick I've ever encountered is to simply put a box in the upper right hand corner of the page with the key word for the Project or Note in the box. It only takes a second and it will make your papers much easier to file away and retrieve. I do the same thing for papers that I am filing at home instead of in my planner, though for important originals, I use a post-it note as the box.
The Index:
Always make an index of what is in your planner. It doesn't need to be in any particular order, but it will help you decide where to file your Projects or Notes and when to start a new Project or Note instead.
The Chart:
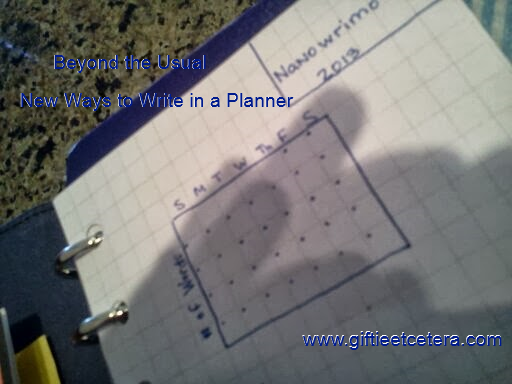
Using graph paper, you can quickly and easily draw a little check off goals chart for any month.
This one is intended for National Novel Writing Month, but you can do the same for workouts, calorie counting, or whether you remembered to take your daily medicines. If you want it to become a habit and want to track your progress, the chart is a great tool.
(Ignore the ominous shadows. I think there was a ghost from the 1980s admiring my planner.)
The Checkbook:
I use my planner as a checkbook/credit card log, as I have shown here before when talking about budgeting. But you can do the same with writing goals (shown here: me trying to write 50,000 words of a novel in November, subtracting as I approach my goal), calories for the day or week, spending, or any other number that you want to track.
The Highlight:
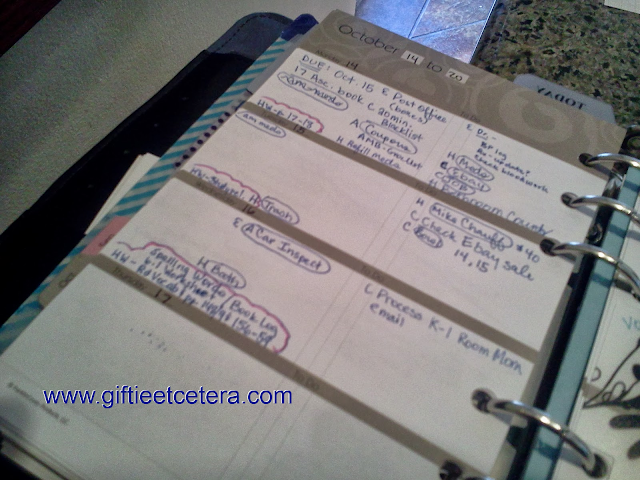
I don't actually use a highlighter to highlight. Instead, I use a red or pink Frixion pen. But if something needs to be separate or merits special attention, highlight it and it will pop out at you. In this picture, it's my 2nd grader's homework in the bottom left hand corner of each weekly entry.
The Underline:
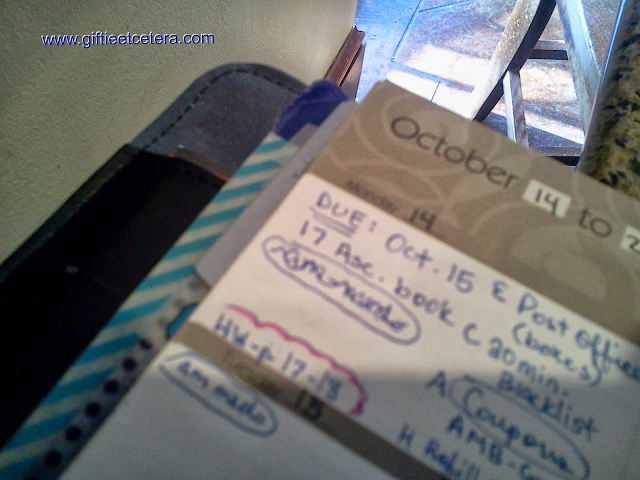
I underline due dates, twice. Note my other hidden trick: I write the due date on the day BEFORE the library books (or other deadline) are due.
The Line:
Whenever I take notes, whether at a meeting or for myself, I draw a vertical line about 1/4 into the page. I take notes to the right of the line, but on the left, I make notations of anything that I need to follow up on. Students can also use this technique to note definition terms or test questions to the left.
In the example below, I need to email parents to find two substitute teaches for the Christmas party by December 10th. I also need to email parents about a gift card and purchase it by the end of November.
The Code:
In the picture above, I used the code C for things that can be done only at my computer. Other useful codes include:
@ [name/date/action] = after someone else does their part or a certain date passes or I do part one of the task, I need to take the next action.
E = errands
Ph = phone calls/text messages
H = home
A = anywhere
My advice? Keep a list of codes that mean something to you in your Notes section of your planner and use them to save space and group like actions together.
H = home
A = anywhere
My advice? Keep a list of codes that mean something to you in your Notes section of your planner and use them to save space and group like actions together.
