Wednesday, August 21, 2013

Flexible Planning

***This post may contain affiliate links. See my "Disclaimer" link for additional details.***

Morning carpool is a long trip for me. I drive the kids into the city from the suburbs, a hour and a half round trip. (My husband, thankfully, gets off work in the city early enough to pick up the kids.) 

Carpool takes up enough of my day that it is worthy of a note on my calendar, even though it happens every single weekday. Usually, since I am in the city anyway, I plan errands after school drop-off. 

Today was no exception. I needed to pick up fish supplies and run to the specialty store for enchilada sauce.

There was a wreck.

Now, if you lived in Baton Rouge, you would say there is a wreck every day and it is to be expected. Eye. Roll. Well, grudgingly, yes. But in my defense (for using this admittedly lame example), the wrecks are not usually in front of the specialty store.


planner, pink pen, pink ink pen, erasable ink pen, chore list

Fortunately, this is no problem for me since I build flexibility into my planning. A quick glance at my planner and I could adjust for the wreck. (Today, that meant changing my supper menu by swapping for another day and planning the errand tomorrow. In place of the errand, I went ahead to the regular store to pick up some items on my long-term list.)

Some keys to keeping your planner flexible:

1. Scheduled events go on your planner in a designated space, whether they are important or not.

Jury duty and job interviews obviously go on my planner, but so does babysitting for my sister and a party that I *might* go to. The only concession that I make for the party is a question mark after the entry. Karate classes for my kid go on my planner, even though my husband does karate transport, since I still need to know when uniforms need to be cleaned and when to serve a quick, earlier-than-usual supper.


2. Unscheduled events and tasks go elsewhere.

In my case, scheduled items go on my monthly pages and unscheduled stuff goes on my weekly pages. (This works, spacewise, if you only have three or four scheduled events per day.) Household routines go on a special page.


Buying a gift for a birthday party is an unscheduled event, EVEN IF you plan to go today and EVEN IF you MUST buy it by Saturday.

Writing the mortgage check is also unscheduled, even though it's on a deadline.

Here's the deal: you do HAVE to write the mortgage check by Wednesday, but you can do it anytime between now and Wednesday. I am not saying not to plan the mortgage check. Your weekly pages should have a note, on Tuesday, that says "DUE: Write mtg. check by Wed." Your weekly pages are for planning and deadlines.

3. Even if you don't use daily pages, feel free to plan out your day.


If you need a schedule for today, just to get everything done in time, put a sticky note with a schedule in the weekly area. Today I have to do two loads of laundry, defrost and cook supper, update my planner, RSVP to two parties, and make a doctor's appointment. This is not a ton of stuff, so my basic weekly set-up and chore list can handle it. But on the first day of school, I had a lot of tasks and scheduled events and made a schedule for that day.

But keep the timed events on the sacred monthly calendar. Keep must dos/should dos in your weekly planner.

4. Don't over schedule.

You heard me. Don't. With the rare exception of a very busy day due to external factors, if you have more than four appointments a day, you won't be able to handle it. Move some of the events to other days.

Exception: If you do customer service (say, when I was a lawyer), you might have eight or nine customers a day. For that, I recommend anything outside of normal work hours go on your monthly calendar, along with a note of normal work hours on your monthly pages. Then use a daily page for actual scheduling during work hours. Do the same thing if you homeschool your kids or teach.

5. Be flexible.

Seriously, my planner is my boss. It tells me what to do. Except when it doesn't!

Sometimes, plans change. I use FriXion pens (erasable), so I can change plans.


Etcetera.

If you enjoy what you read at Giftie Etcetera, please share on social media. Click here to join the Giftie Etcetera Facebook group.

Partied at: Meetup Monday, Over the Moon, The Art of Home-Making Mondays, Monday's Musings, Something to Talk About, Amaze Me Monday, What'd You Do This Weekend, Faith Filled Parenting, Friday's Five Features, Sharing Saturday, Saturday Sharefest, Saturday Sparks, My Favorite Things


Thursday, August 15, 2013

Organized Pantry

I keep obsessively reorganizing my pantry. It is a pretty big pantry and has a decent layout, so I have to blame my OCD. I am never really happy with whatever I end up doing. Hopefully, I changed that today with a $3 over-the-door shoe hanger (bought on clearance plus Kohl's cash).


I used the door hanger to organize my condiments. As an added bonus, I can now tell at a glance if I need to stock up on something like crab boil. (I'm a Cajun girl, after all.)


I even labeled each category so that my family can unload the groceries sometimes without messing up the system. (Okay, I pretend that they will do that. We all know that's probably NOT going to happen.)


Some other tips:


1. I put school snacks in a low basket that the kids can reach.

2. I put like items with like items.

3. I used tiered shelving so that nothing is totally hidden.

4. Items that are rarely used, like paper plates, go in the back of the top shelf.

5. All baking items are in one basket so I can bring the whole basket into the kitchen to cook.

Etcetera. 


Wednesday, August 14, 2013

Divide and Conquer

Despite my detailed posts about my planner use, I actually try to keep things really simple. I don't have a bunch of custom forms. If I need a special form (say, for my budgeting), I just draw it on paper and put it in my planner.

But I do have a trick that is simple, but keeps me very organized and on track. I call it Divide and Conquer. There are three ways I divide up items in my planner: Appointments Versus Tasks, Priority of Tasks, and Context (where I will perform the Tasks).


1. Appointments Versus Tasks

I put all appointments on the monthly calendar. Morning carpool? In the calendar. Told someone I would call at 3 p.m.? Goes on the monthly calendar. Mass day at the kids' school? Goes on the calendar.

Tasks, on the other hand, go in my weekly planner.

I know many people like to see them together, but having my appointments separated out means that I actually know where I need to be and when I need to be there.

2. Priority of Tasks

I list my tasks in three columns. My planner is a horizontal weekly layout. I don't physically divide the three columns in any way. I simply write in three different columns.

Example:

DUE 08/15:                     P Call Sue                       H Unload groceries  
Return Library Bks (6)     C Send Mark email           FYI - Husband working overtime

Under the date, I write tasks that are time specific or DUE. This area is truly reserved for time or date specific items, so it is usually pretty sparse. For example, today was the first day of school. I wrote a note to take a first day of school picture of my kids in the morning. If something is due, I generally write it on the Task page the day before it is due (including the due date in the entry) so that I have time to complete it.

In the middle column, I write stuff that must be done today. It's stuff that can be done anytime, really, but needs to happen. For example, I might have a note to run to the grocery store or take out the trash.

The last column is reserved for things that I want to accomplish today, but that can be easily rescheduled or recopied to another day. Examples include checking the kids' grades on-line or making a doctor's appointment for a yearly checkup.

3. Context

Finally, I sort all tasks by context. That way, if I am running errands, I can glance at the errands and do a bunch at once. If I am working at my computer at a coffee shop, I can go ahead and do all my computer tasks with just a glance.

I simply write a one letter code in front of the tasks, indicating where the task will be done.


A = anywhere
C = computer
E = errands
H = home
P = phone

Examples (note that they all start with a verb):

A Make monthly budget
C Send email to volunteers
E Spend Kohl's cash
H Clean under side table
P Call Mr. Frank

If something is for my information only, it gets an FYI in front of it.

And if it refers to a project, I circle a P in front of it. (I have separate pages for planning multi-step products, but deadline tasks still go on weekly task list.)

Physically dividing up tasks from appointments, priorities, and contexts means that much of the decision-making of tasks is done for me. I don't experience that paralyzing "what do I do now" moment that most of us know so well.

Etcetera.

Monday, August 5, 2013

Tricks To Make Yourself Use Your Planner

The most common complaint that I hear about planners is that people forget to look at their planners. A planner doesn't do you any good if you don't use it! 

Here are some of my favorite tricks and tips to help you use your planner and avoid planner fail.

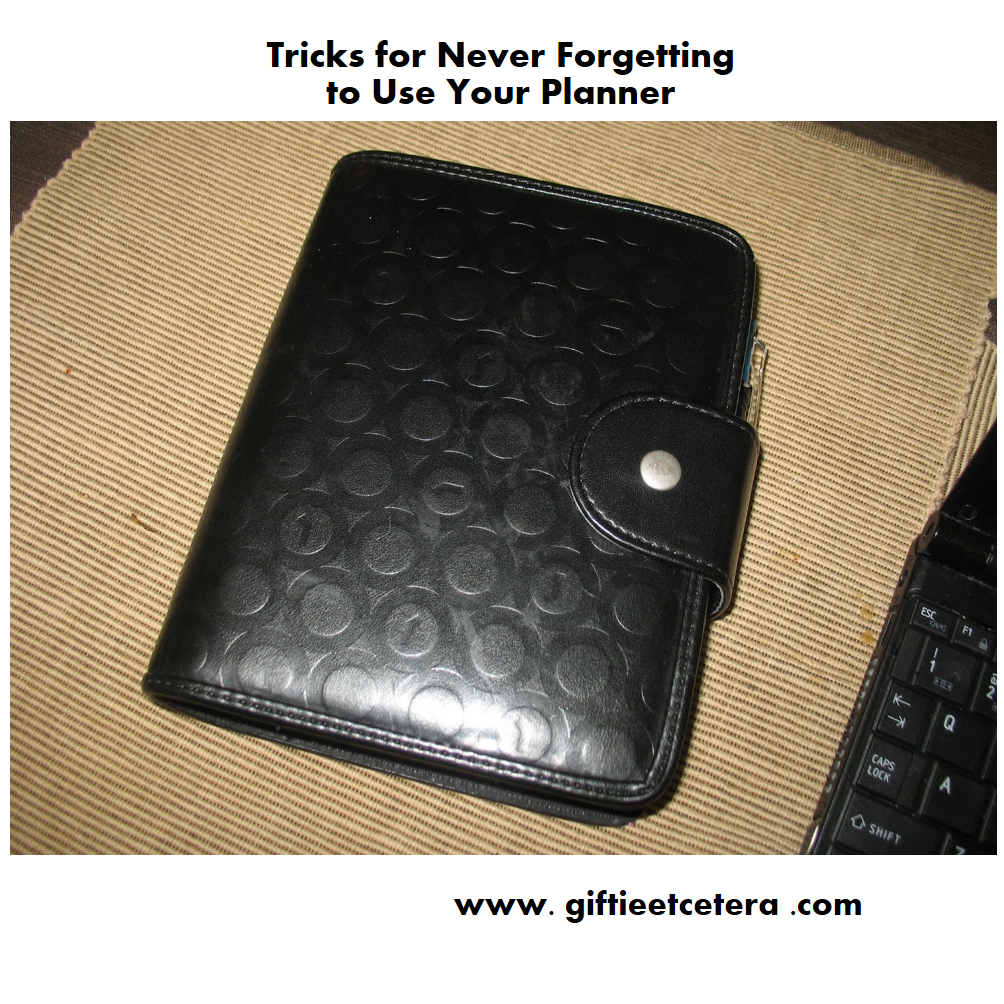
1. Get a planner that you love. For some people, that means an expensive leather planners, like the popular Filofax or Gillio planners. For others, it's a cute cover. For me, I need something fairly neutral, but with texture, like my black Franklin Covey compact 365 planner (bought many years ago) and with lots of color inside:

planner, write, tricks, planner tricks

2. Keep your planner in a designated spot or two, convenient to the places where you are most likely to look at it and write in it. For me, that means next to my netbook:


...or in the basket that holds my purse and outgoing items.


Girly aside: Isn't my new purple purse gorgeous? (Jennifer Lopez Monica purse in purple at Kohl's, discontinued and on clearance.  You're welcome.) It fits my planner perfectly, and opens and closes easily with this magnetic folding top:


3. Carry a purse or bag big enough to keep your planner with you.


4. Keep errands items in your planner so you remember to take it everywhere. You can see the Kohl's cash that I will use next week tucked into my planner.


5. If you keep any running logs (examples: budgets, checkbook registers, logs of tax-deductable donations, food logs), keep them in your planner so that you open it daily.

I keep a budget log each month in my planner, with an envelope to save important receipts.


I also keep a log of school expenses.


And I keep a food log daily.


6. Have a dashboard. You need an area where you can write things down quickly. If you are cooking dinner and just need to jot down that you need to buy more onions or if you are brainstorming places where you might have stored your phone charger, the dashboard is your place. Having a quick spot to write things will save you from random stickie notes and lost slips of paper.

7. Write ALL appointments down.  This sounds obvious and simple, but do you write down your kid's weekly karate class? If not, when a friend calls for a playdate, you might not remember the conflict. If you write every appointment down and train your friends and family to watch you write it (or it's not really a "plan"), you'll use your planner daily and be able to depend on it.

8. Put routines in your planner.


9. Use your planner to plan projects. Events, shopping lists, and brainstorming all go in your planner. Once your brain gets used to thinking when you open your planner, you'll almost NEED it in order to function.


10. Keep important information in your planner (unless it is secret, like your social security number). If your kids' school hours are in your planner, you don't have to remember the times when you book a doctor's appointment. Your planner should be your go to place for finding out when your husband has vacation or your boss's birthday. (Tip: keep secret info. in your planner by using a code. For example, change social security numbers by subtracting one from each number.  455-68-9150 becomes 344-57-8049. Only you know how to break the code. If you are consistent, you will remember.)

Happy planning.

Etcetera.

Thursday, August 1, 2013

A Saint Zita Miracle: I Finally Learned How To Clean The Bathtub

I've been cleaning showers or tubs since I moved away from home at age 15.  I went to the best residential high school in the nation.  (Okay, that is mere opinion.  But it's definitely in the top 100 public high schools in the nation.) I learned theater, roommate relations, and how to do laundry. I used a paper planner for the first time at boarding school. I never did manage the cleaning tubs and showers thing.

I plan to clean the house every week.


Cleaning the tub never happens.

Our bathtubs are always gross. No matter what I do, it's just hard to clean them. Harsh chemicals mess with my asthma.  Tough scrubbing, like with a magic eraser, hurts my body and makes my physical therapist grumpy.

Add in the complications of the various soaps and lotions that we use on The Loki to deal with his eczema, my husband's oily skin, and my habit of skipping cleaning the tub for weeks at a time, and you get slime. It is disgusting.

But I found the solution. Today, cleaning the bathtub took a total of 3 minutes. I timed it. Here is what I used:


I got the idea from the natural, more budget-friendly cleaning products that I've been using to clean floors, appliances, and surfaces.  I bought a heavy-duty spray bottle, several cheap microfiber towels, a gallon of white vinegar, and some cheap dish soap. I mix a 1/8 cup of dish soap to 1/2 vinegar and 1/2 hot water and use that to clean. (I never reheat the water after the initial mixture.) Obviously, I've sprayed this mixture on the tub before, with mixed results.

That's just because I didn't know The Secret.

Shhh, now this is a big secret. After all, you don't want your spouses, roommates, or employers to know that you didn't spend all day scrubbing the tub. But you won't spend all day scrubbing the tub anymore.  I promise.  Here's what you do:

1. Spray my vinegar and water mixture on the bathtub wherever it is groody. If there is a particularly yucky ring, feel free to use pure vinegar without water.  (You'll rinse it soon enough anyway.)

2. THE SECRET: Fill the tub with water from the hot tap only, until water is slightly above the ring around the tub.

3. As the tub fills, add about 1/8 cup dish soap. (Or, do as I do and pour soap until a count of 5.)

4. Do something else for five minutes. (I like to paint my toe nails.)

5. After five minutes, unplug the tub. As the water drains, quickly wet the microfiber cloth in the tub water and wipe away the grime. It wipes right off. Continue following the water around the edge of the tub with the cloth until all the water drains.

Seriously, the hot water mixed with the vinegar just melts the grime away. It's important that it be hot, that it soak for five minutes (too early is not going to work well and too late and the water will cool too much), and that you do wipe.

St. Zita, by the way, is the Patron Saint of Housekeepers.

No more slime!

Etcetera.